Example
Before running the code, the user should edit the config.yaml to tailor the application of VizChemoton to the given specific system. Even so, the default config.yaml is set so that the user can run VizChemoton out-of-the-box with the data in the ./vizchemoton/resources folder. In the docs/manual.md, we provide a detailed explanation of the parameters in config.yaml.
# Activate conda environment
conda activate my_env

# Edit the config file
vi config.yaml

# Run the code of this repository (at the /vizchemoton level) to obtain the html
python3 -m vizchemoton
The code renders a .html file, with the path and name specified by the user, which contains the compounds and reactions of the reaction network.
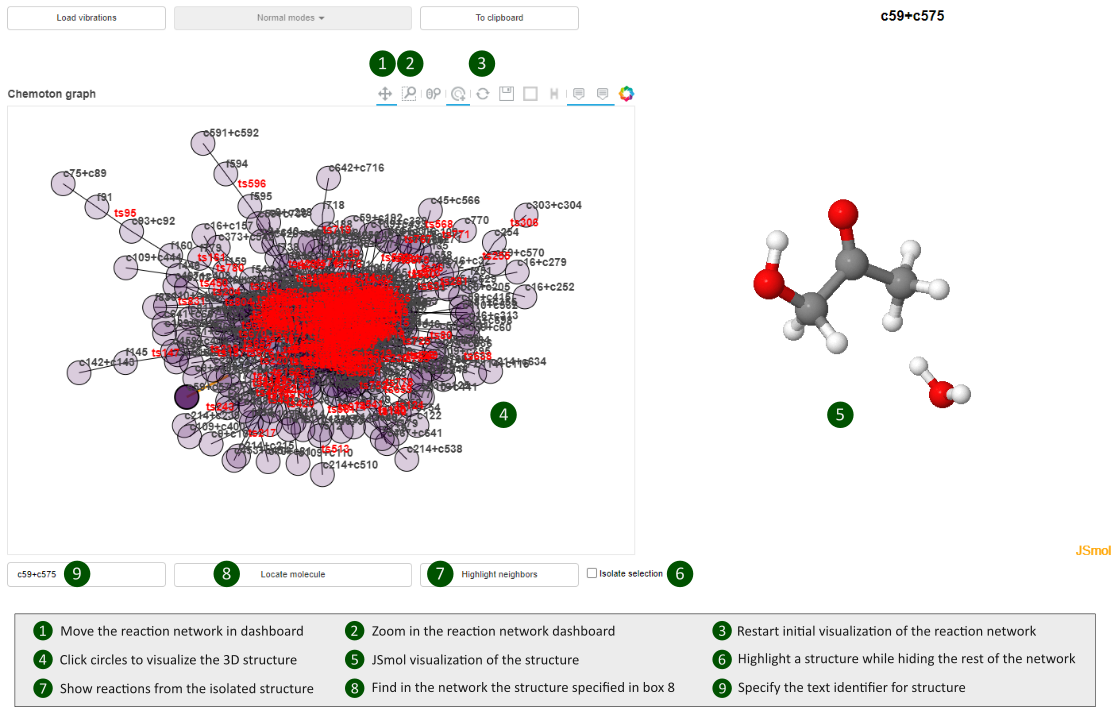
Double-clicking the .html file will open a dashboard similar to the diagram below, where we have depicted the description of the main built-in functionalities.
Note
VizChemoton has been applied to the ozonation of model olefins in water. The reader can download the 3 associated HTML files from the Zenodo repository. We recommend downloading the CRN_T_network.html file since it’s the smallest in size, and thus more manageable.
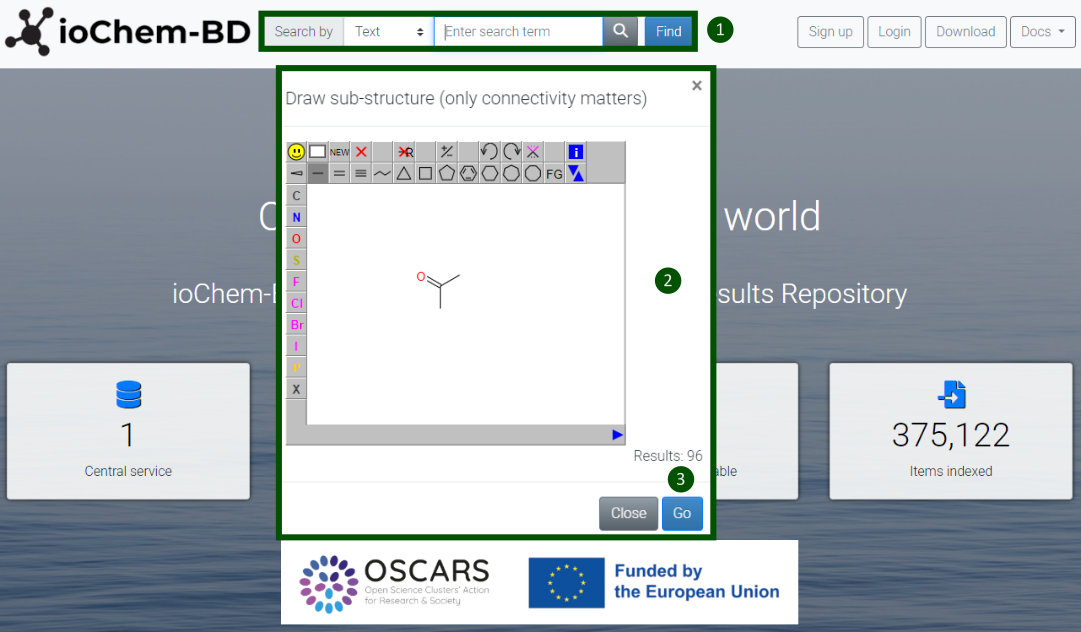
If the reader wishes to find a specific molecule in the network, we recommend using the Find module of ioChem-BD. The diagram below shows the three steps: (1) select search by structure, (2) draw the chemical structure that you are interested in, (3) if Results is greater than 0 press the button go. This will redirect you to the Browse module, where all the calculations involving the drawn structure will be listed. Next, you should search on the right side of the screen for the box named Author, and click the name Enric Petrus. The Title name of the searched structure will be the same as the one in the network HTML file.